How To Install Tradepoint with SQL Server 2005 Full Edition
Aug/20/2006
If you have a great deal of data, it may become necessary to install SQL
Server 2005 Full Edition on a remote computer or in your office. This Knowledge
base article will help you do so.
Uninstalling Tradepoint:
Note: If you are a new user you can skip down to "Installing SQL Server 2005
Full Edition":
The first step is in Tradepoint click on the icon in the top left corner and
choose Backup/Restore and backup your database to somewhere where you'll be able
to access it later.
You'll then need to uninstall first SQL Server 2005 Express Edition from your
computer and then Tradepoint. You can do so from your Add/Remove Programs in
Control Panel.

The first one to choose is "Microsoft SQL Server" and click the
remove button. You will be prompted to choose the instance that you wish to
uninstall:
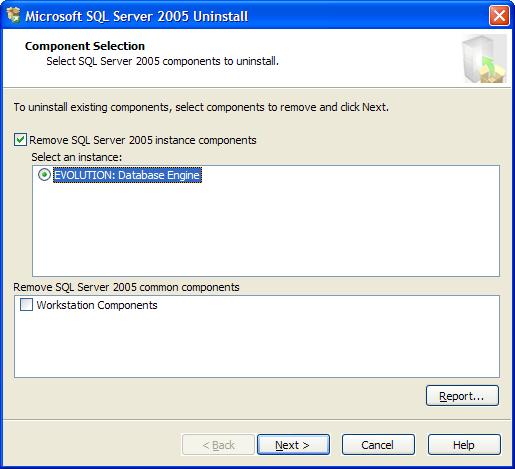
You may also check off Workstation Components if you wish. These
will not be used anymore unless you have other applications that require
them.
Once SQL Server 2005 is uninstalled you can proceed to uninstall
Tradepoint For Windows from your Add/Remove Programs listing. Simply click the
remove button and wait until it's complete. At this point we suggest that you
restart the computer.
Installing SQL Server 2005 Full Edition:
Drop in the CD/DVD that came with the package. Make sure that if you have two
CDs that you choose the one for your operating system. If you are unsure which
Operating System you have, pick the one labeled x86. If you have a DVD version,
you will be prompted with a screen such as this:
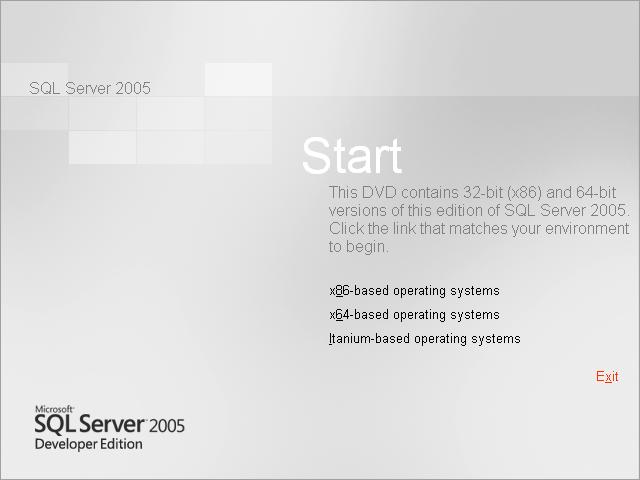
Choose your operating system (choose x86-based operating systems
if you are unsure) and then you will be presented with the following screen:
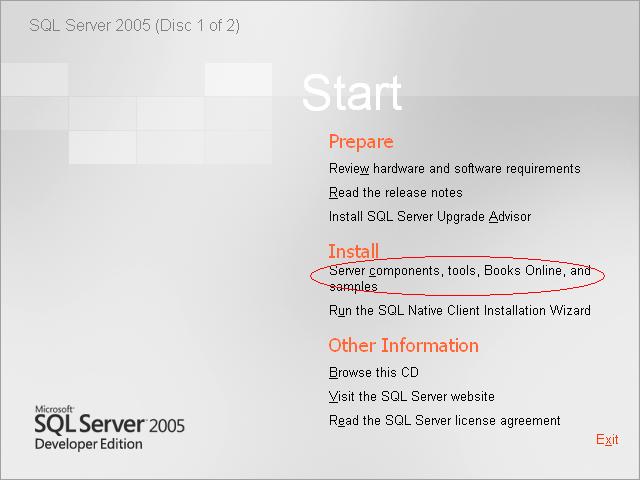
Make sure you click the item that is circled in red above.
Next you will be presented with serveral prompts which only have
one button that you can click for moving forward and accepting the licence
agreement. Please do so until you're presented with the following screen:
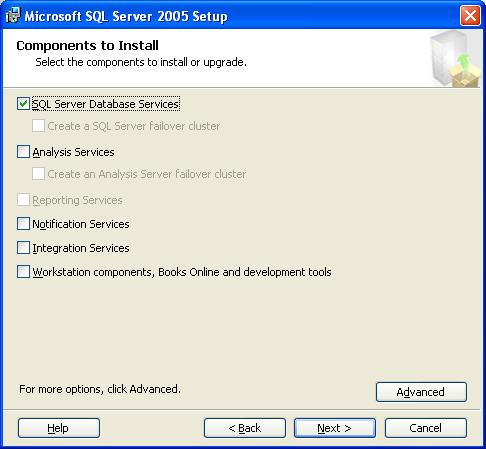
Make sure you check off SQL Server Database Services and ensure
that the rest are not checked off then click next.
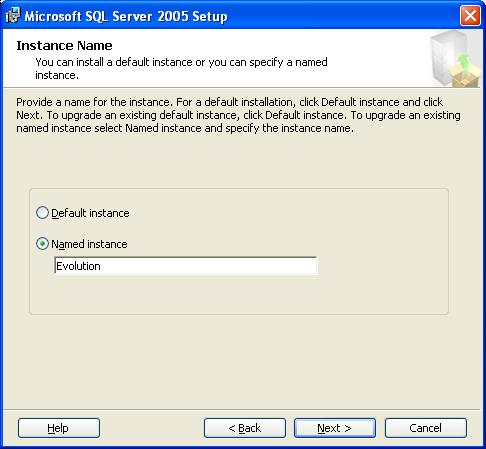
Next you'll be asked to create an instance or choose Default
Instance. For Tradepoint to setup automatically for you you must choose Named
Instance and type in Tradepoint into the box before clicking next. If you choose
Default Instance you will have to install Tradepoint manually which is not
recommended.
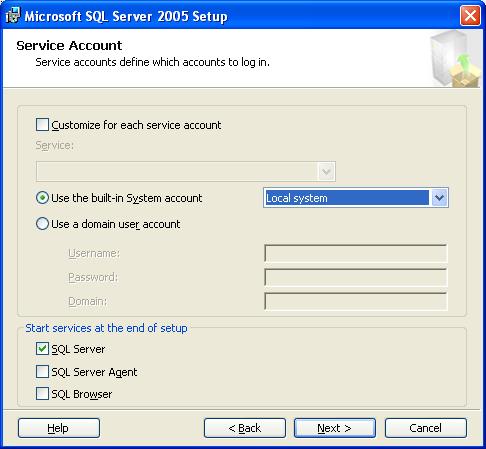
The next step is to tell SQL Server how to run on your computer.
You should only change Use a domain user_account to Use the built-in System
Account and make sure it says "Local System". Leave everything else the
same.
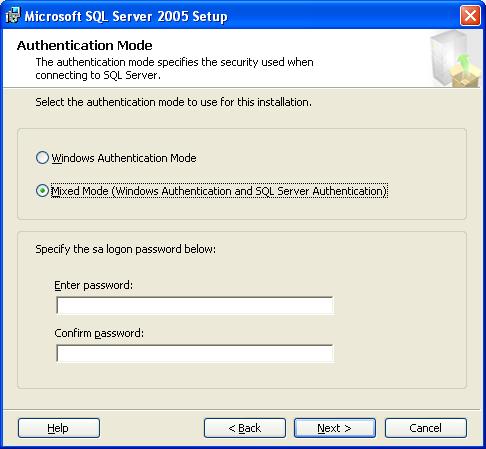
The next step is to choose Mixed Mode Security (do not choose
Windows Authentication Mode or you will receive errors during Tradepoint
Installation). You can enter whatever password you wish at this time. It will be
automatically reset by the Tradepoint Installation.
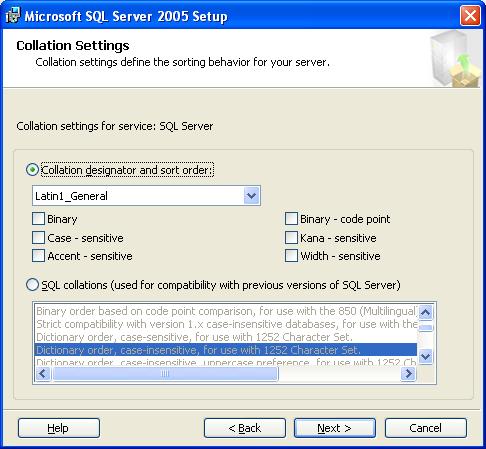
The next screen is to do with how SQL Server handles text for
multiple languages. Choose Collation Designator and sort order instead of the
default SQL collations (used for compatibility with previous versions of sql
server) and make sure that it says "Latin1_General" in the drop down leaving
everything else the same and then click next.
SQL Server will install after a while and you'll be prompted to
click next. Please do so, then click Finish. SQL Server is now successfully
installed on your computer
Installing Tradepoint
Now that you have SQL Server installed on your computer you can
now start the Tradepoint Installation process. Simply double click on the
TradepointSetup.exe file and follow the instructions answering yes to the
Licence agreement when prompted.
Once Tradepoint is installed, click the Finish button and then
goto your start menu and then all programs and then choose "Tradepoint for
Windows" from the list (should be at the bottom).
Note: You must be logged into your computer as an
administrator at this step otherwise setup will fail.
It will prompt you with a welcome screen welcoming you to the
software. Click next.
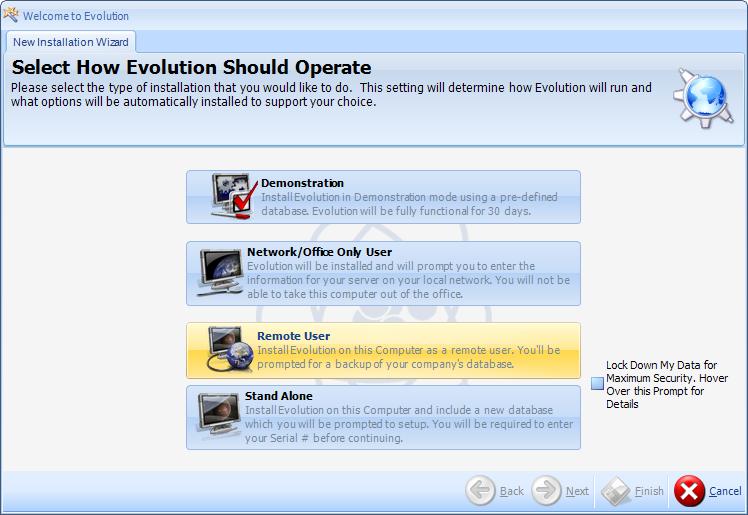
Next you will be prompted to choose the type of Installation that
you are completing. Choose Remote User:
Tradepoint will then detect that SQL Server is already installed
and simply skip to the next step which is to configure the server and then
prompt you for the path to the backup file that you backed up at the very first
step. (or your system administrator provided) Click the search button and
find the backup file and then click next. The setup will download any
updates, restart and install the update and then continue to synchronize your
database. Once the synchronization process is complete you can click finish on
the wizard and login to Tradepoint with the Login and password that your system
administrator supplied.
Congratuations, you have successfully upgraded your Tradepoint for
Windows to use the full SQL Server 2005 and do not have a database size limit
any longer.