The Availability screen allows you to manage multiple availability streams for the employee.
What are Availability Streams?
Availability streams are one of the more powerful concepts in Tradepoint. They allow each employee to have multiple streams of availability. For instance, if an employee is traveling but is available for a conference call on their cell phone they would be doing two things at once. In a traditional calendar system you would have trouble scheduling this because the events overlap. In Tradepoint, by setting up multiple streams for the employee you can effectively manage double booking for any employee at any time.
Establishing Availability
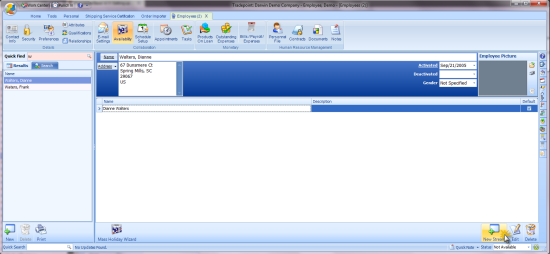
Availability is established by clicking on the Employees Icon  and then clicking on the
  availability icon within that section.
The following screen that comes up will have an icon in the lower right hand corner labeled 'New Stream'  .
.
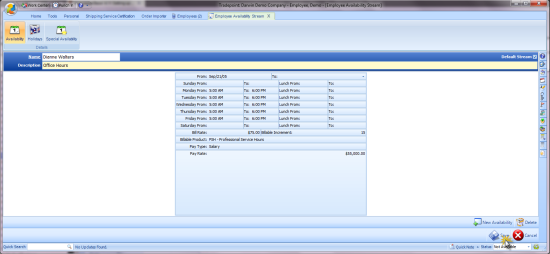
Clicking on that icon will bring up the main screen that you will establish your hours of availability. These settings will populate the Collaborative schedule and be available to everyone who has security permissions to see your schedule.
Click on the New Stream icon in the lower right to open a new Calendar for an Employee. Fill In the Name and Description. This will distinguish between multiple streams of hours if applicable to your situation.

The date will populate in as the day the calendar was created. This can be backdated by clicking on the date field and choosing from the calendar or typing in a date. To always display the calendar leave the "To:" field open with NO date. Under the "To:" field in the date section leave this open unless you would like the calendar to no longer display within and Employee profile after that date.
Clicking on the field just left of the "Monday From:" under Monday and typing in a number will allow the same time to be entered in for Monday-Friday. The same function exists for Saturday & Sunday.
By setting the Applicable Between Dates you can set up a number of different periods of availability. For example, if you are available during different hours in the summer and in the winter you would create an availability entry for November 1 to April 1 with your winter hours, and a second entry for April 1st to November 1st for your summer hours. Using these dates, Tradepoint will automatically adjust your availability in the appointment book.
From there the next step is to set the specific hours that you will be available and want to have visible in the Schedule.
Below the applicable dates you can set the hours that you are available each day of the week, and any lunch period when you are not available. To enter the times, simply click in the desired cell and start typing the time you wish to enter.
Clicking on the field just right of 'To' under the day your availability begins will allow you to then start typing out the hours. Simply type out the complete time you want to set your hours at. The return key or down arrow will automatically populate the hours you have set on the days through Friday with that beginning time. if your hours vary you will need to type in the different hours under each specific day you will be available. The hours on Saturday and Sunday do not automatically pre-populate with this first step however, you can set them your self repeating the previous step.
For employees working less than the company's default work days ("part-time" employees) the days not worked must be "skipped" in the stream. To set a default work day to skipped, set the Day's From time to "null" (by selecting the cell and pressing CTRL+0 (zero)) and the Day's To time to "12:00 AM" and set Lunch From and To times to null as well. (This says that, on a skipped day, the employee starts work at "no time" and ends work at "no elapsed time".) (Using null ensures that a cell is completely empty.)
Any settings for Billable Hours can also be established here and will need to be done for an Employees information to pre-populate in other sections such as Projects. At the bottom of the Availability Stream you will see a group of fields to establish any applicable billing rate.

Simply enter in the Billing Rate per hour and and incremental time and specify any Billable Service and any Billable Hours performed by this Employee will then be tracked throughout Tradepoint.
Once this is finished then your availability will be able to be viewed through the collaborative scheduler to those who have security permissions to do so. You will also be able to view the available hours of other employees who are also set up in the schedule.