9.23 Paying Multiple Bills Simultaneously
Apr/16/2007
Paying Multiple Bills simultaneously for one
Supplier happens with the steps shown below.
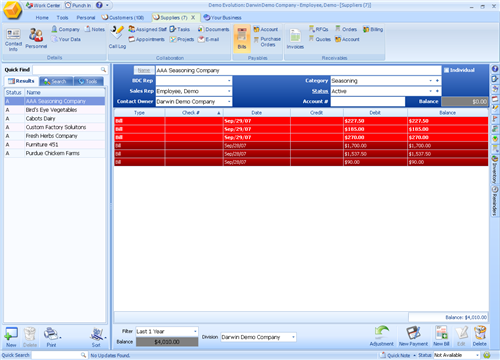
Highlight each of the open Bills by holding down the Shift
key and highlighting the top Bill and then clicking on the lowest listed Bill.
All Bills will then be highlighted. Below is a view with only part of the bills
highlighted. The Bills in darker red have not yet been highlighted.
Once you have highlighted all the Bills you would like to
pay at the same time then click the 'New Payment' icon in the lower right corner
of the screen.
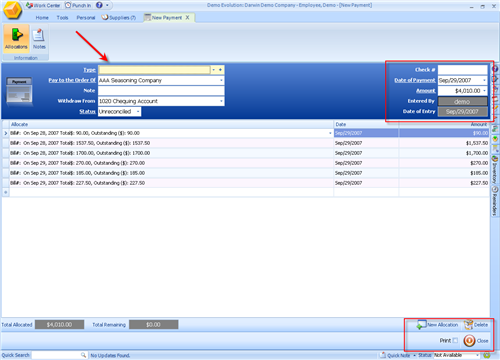
The screen you will see next will have all of the
highlighted Bills listed. Choose the Type of Payment(Check, Cash, Credit card,
etc.). If the Bills will be paid by check then add the check number. The Account
to withdraw the Funds from will automatically be filled in. Should you want the
Payment to come from another account specify this by clicking on the drop down
menu in the field labeled 'Withdraw From'.
When you have specified the information relevant to the
Payment information then click the Save icon and check off the Print
box in the lower right part of the screen. You will be taken to a Print
Preview window that has a default layout for printing
checks.
Keep in mind that this is a default layout and may
need to be adjusted somewhat to fit your exact layout of your checks to Print.
This can be done by clicking the Customize icon at the right of the Print
Preview tool bar.
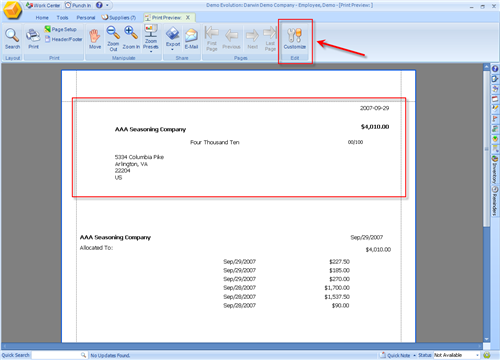
The default format for check printing is shown above.
Clicking the Customize icon will open the screen to allow you to move the
elements of this report around to be able to Print out exactly the information
you need to be able to electronically print out the checks for this payment.
The information you see listed here will be different in
the Customize view simply because each of the fields you see above is being
pulled into the Report function from another place in your data set. Plainly
spoken this means the listed payments will likely show up as one field only as
well as the Address.
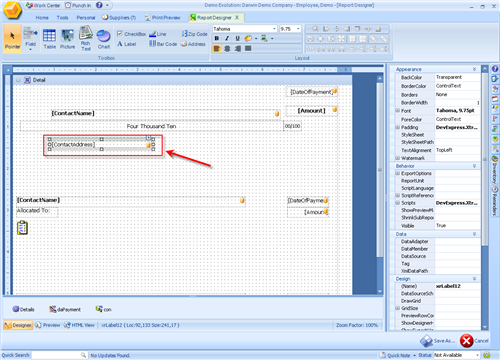
All of the fields shown in the image above can be dragged
and dropped to a different location. When you click on any one of those fields
it will appear as shown above. When you have finished making any adjustments
click the Save icon in the lower right hand corner and follow any prompts to
Save changes to your Check printing template.
Related Articles
<Articles>