11.29 Shipping Wizard
Mar/27/2007
Tradepoints Shipping Wizard is accessible from 3
points of entry, giving you the flexibility in defining your work flow process.
The Shipping Wizard can be accessed through:
- An existing Order within a Customer's contact file
- An existing Purchase Order within a Supplier contact
file
- Through the Shipping wizard within a Warehouse contact
file.
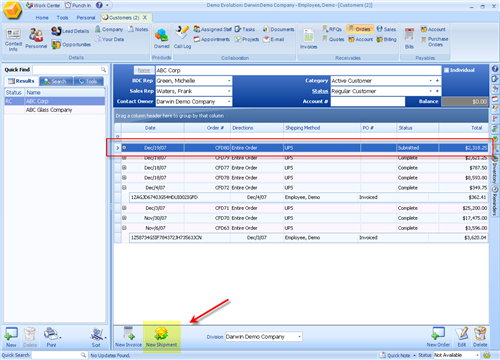
Accessinig the Shipping Wizard through a Customer contact
is done by following the pathway to reach the Order screen.
- From the Home Tab click on Customers.
- Click on Orders.
- Click on one Order to highlight it.
- Click on the Receive Inventory icon to start the
Shipping wizard to bring in Inventory against an open Order.
- The screen you should end up on before you start the
Shipping Wizard is shown below.
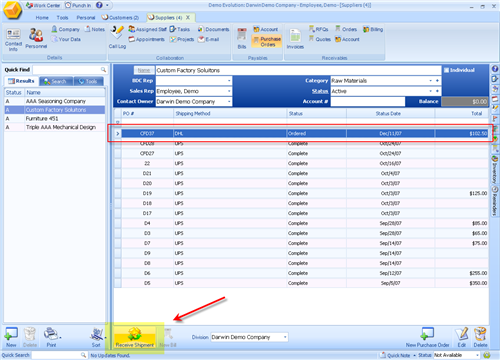
Accessing the Shipping wizard through a Purchase Order is
done by following the steps outlined below.
- From the Home Tab click on Suppliers.
- Search for or type in the name of a Supplier and click
the search icon to bring up that contact.
- Click on Purchase Orders.
- Highlight a Purchase Order by clicking on it once.
Highlight the P.O.'s that are not completed.
- Click on the 'New Shipment' icon to start the Shipping
Wizard.
- The screen you should end up on just before the
Shipping Wizard opens is shown below.
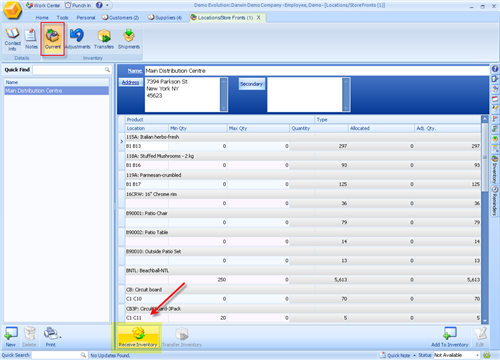
The third way to access the Shipping Wizard is through a
Warehouse. Follow the steps delineated below to access the Shipping Wizard
through a Warehouse.
- From the Home tab click on the Warehouse icon.
- Click on the Search icon to bring up the Warehouse/s
you have in your system.
- Click on the Current icon in the Warehouses to bring up
the current Inventory levels
- To start the Shipping Wizard click on the 'Receive
Inventory' icon.
- The screen you should see before you go into the
Shipping wizard is shown below.
The steps the Shipping Wizard takes you through
include:
- A screen for you to choose the Warehouse to bring
Inventory into.
- The next screen will ask you for an existing shipment
or a new one with a preference for a Supplier.
- The next screen will be the result of
your previous choice and will ask you for specific Inventory or to choose
items.
- The next screen will ask you if you want to assign a
'Reference Number' and have a check box to automatically generate a Bill. The
reference number here can also be a batch number if you need to assign a batch
number to incoming Inventory.
Related Articles
<Articles>