14.36 How to Import an Existing Document into Tradepoint
Apr/1/2007
Within Tradepoint
you can import a New Document in multiple places. The process to import a
Document will be the same wherever the Document is created. This functionality
within Tradepoint provides an innovative and dynamic tool for document management
in a business software application.
From any Contact
file within the Collaborative tools section of the toolbar you will see a small
icon labeled Documents.  Clicking this icon will open the main
window to view any existing Documents associated with a contact.
Clicking this icon will open the main
window to view any existing Documents associated with a contact.
Document management
within Tradepoint is also structured by Categories so any existing documents will
be organized by Category. An example of this is shown below.

Clicking on the New
Scanned Document icon  will open a wizard to walk you through
adding a document with a Scanner attached to your computer. Clicking on the New
Documents icon
will open a wizard to walk you through
adding a document with a Scanner attached to your computer. Clicking on the New
Documents icon  will open the main page to import a new
document from within Tradepoint with. When the New Document icon is clicked the
main screen you will see will have options to create a New Document, establish a
link with a current Document and import a Document from your computer's hard
drive.
will open the main page to import a new
document from within Tradepoint with. When the New Document icon is clicked the
main screen you will see will have options to create a New Document, establish a
link with a current Document and import a Document from your computer's hard
drive.
To import a
Document you will need to use the section for creating a New Document shown in
the screen view below. This will be towards the center of the main page and is
shown in the screen view below.
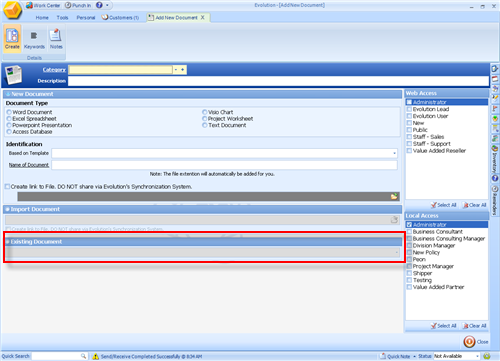
Simply check the
circle next to Import Document and then click on the folder on the right side of
the screen. A window to access other portions of the hard drive on your computer
will open and you can choose the Document you would like to add to the file
within Tradepoint.
From there simply
set any Security Settings and Save your changes to the Document you have
Imported into Tradepoint.
Related Articles
<Articles>