3.4.3 Language Localization - Step 2
Feb/1/2009
Completing localization for multiple
languages can happen after the Company Settings have been setup for more than
one language.
One or more languages can be setup through the Company
Settings and then the actual content will need to be uploaded or created
manually through the Localization settings found in the Tools tab.
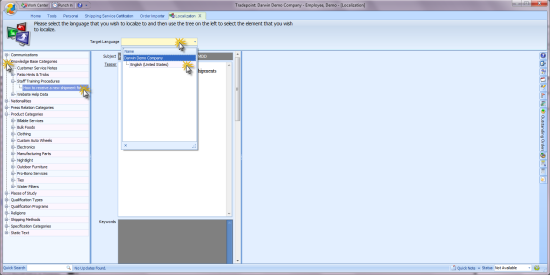
From Company Settings click on
the Tools tab. The localization icon will be visible.

The main screen
will show your pages listed on the left with expandable menus for sub pages in
the 'plus signs'. 'Target Language' pulls the information from localization
settings which have been setup in Company Settings for language
localization.
Clicking on any
of the listed pages with any of the drop menu options of listed available
languages will open that particular page to be localized for that language or in
this case variations of English.
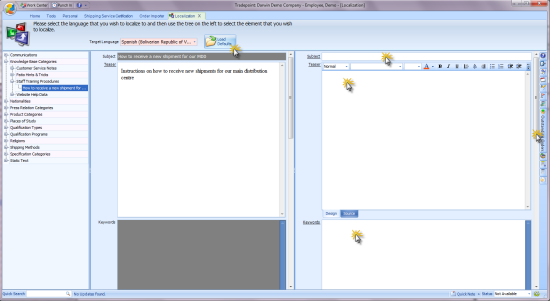
Content can be
entered in manually on the right hand side, or copied from another source. An
image can be uploaded into the content from the icons highlighted or added to
the Static Text pages under the Tools tab.
Note: Most
browsers will automatically pick up the language of the IP address of the user
on the computer showing in their native language. However, using a translator
and directly localizing pages for specific markets will yield more accurate
results in the subtleties of language dialect and give you more control over the
information you present within a given
market.