6.24.5 Collaborative Email Tools- Create a Task from an Email
Sep/19/2008
Creating a Task
…
Going from Email to task is done using the right
click options from a highlighted email. Within the new Task will be the contacts
(if sent to multiple recipients within your company they will all automatically
be added) and any guests (contacts within Tradepoint that are not Employees).
The email content will automatically be populated
into the Notes section of the Task.
Any documents will be added to the Task. If there
are documents you will be prompted before they are added as attachments to the
Task.
In this example the documents will be added
automatically to the task when ‘Yes’ is clicked.
The main screen of the new task will appear similar
to the example shown below.
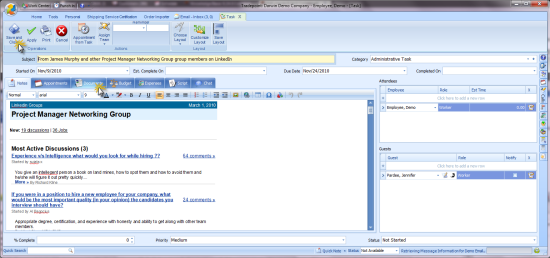
This example email shows the email content in the
Notes section with mail recipients added to the Attendees and Guests section.
Additional contacts can be added using the ‘New Attendee’ or ‘New Guest’
icon.
Additional tools will enable you to:
·
Create an Appointment from this Task (Appointment structure
and content will be duplicated with this option)
·
Add a Reminder (the Reminder will go to all
participants)
·
Establish Date Range for Completion and Estimated
Completion dates.
·
Print out the Task details by checking of the print box
(after saving you will be directed to the Print Preview
screen.
Easy Use Tip #3: This example had a default Category set
within their Employee profile for Tasks and one for Documents as well. If those
were not set, within your profile you will be prompted as to what the next steps
would be. For Documents you must have a default Category set for the document to
be attached or linked to the Task, otherwise the Document will not be attached
to the Task.
You will find the Documents that were attached to
this Task from the Email under the documents icon at the top of the
page.
The highlighted document above shows the activity
trail of the user who created the Task. Changes can be made to this document and
the activity will be time/date stamped.
The highlighted tools you see at the bottom of the
page are the actions available for that document.