9.3 Establishing your General Ledger Manually
Jun/10/2007
Manually creating a General Ledger structure is ideal if you are a
new company and using Tradepoint for the first time. We do recommend you
consulting an Accounting professional if you are looking to create your General
Ledger manually.
Setting up your General Ledger manually can be done with the tools
available in Tradepoint. After you have setup basic Company Parameters within the
Company Setup section of the Tools Tab Toolbar you will be ready to establish
your General Ledger.
Clicking on
the Tools tab and then the Company icon as shown below will take you to where
you establish your company profile and General Ledger.

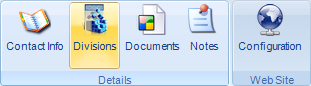
From there
you will see the main screen where you add you Contact information if you have
not already done so. The tool bar will look like the example you see below. The
next step will be to click on the Division icon that you see
highlighted.
If
you have established the basic information including Contact Information and at
least one Company Division (if that is relevant to your company structure) you
will be ready to manually set up the General Ledger for your
Company.
The tools
available for each Company Division are shown in the tool bar below with the
icon for the General Ledger highlighted.

The Chart of Accounts
will need to be setup before you can assign any shipping, invoicing, and
ordering preferences since you will be prompted to associate certain accounts
with some of those preferences.
The Main
window for manually establishing your Chart of Accounts is shown below. As the
Account structure is listed it will be shown in the manner you see
below.
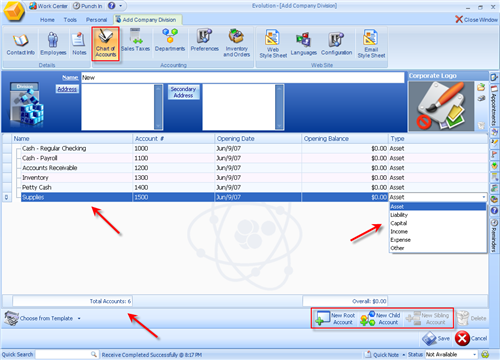
Clicking the New Root Account icon on the lower right will open a
field in the listed accounts and it will activate the New Child Account icon.
Two examples of Child Accounts are circled. The New Sibling Account icon will
open a Sibling Account just below and Child Account when clicked
Name: The name of the Account is
established by typing the name of the Account into the respective fields.
Account#: The Account Number is assigned
manually by typing it into the field.
Opening Date: The Opening Date will be the day the
account was created unless you use the built in calendar to specify a different
date.
Opening Balance: Opening Balances are also added
manually by typing the amount into the field or using the built in calculator to
enter the correct amount.
Type: The Type column on the far right
contains a drop down menu with the different account types embedded for you to
choose from.
The
Total number of Accounts will be shown on the left in the window towards the
bottom.
Save
your changes here. While establishing your Company's preferences you will be
allowed to go through different windows to specify preferences without being
prompted to Save your changes so, be sure to Save your changes.
If
you try to close the Company Setup window and you have not Saved your changes
you will be prompted to Save your changes before Tradepoint will allow you to
close the Company Setup window.
Related Articles
<Articles>