Creating a Custom Website Payment Editor
Dec/8/2010
Define the Payment
Editor
1) Create a web usercontrol (ie. an *.ascx control).
The custom payment editor does not have to inherit from a special base class, it
can be a default System.UI.UserControl. It is advisable to inherit from
Tradepoint Enterprise.PaymentServices.Web.WebCtrls.BasePaymentEditor to take advantage of
existing helper methods for performing common tasks.
2) Handle the click event of the submit button you
provide in your payment editor to begin your processing of the order. An
Tradepoint Enterprise.PaymentServices.Web.IPaymentProcessor is required to be set by the
payment editor before redirecting to the success or failure pages. The purpose
of the IPaymentProcessor is to 1) handle determining if the payment has already
been processed before and 2) to handle the updating of the order to reflect the
payment state or do any actions that you wish to do as part of your order
processing procedure.
If you do not not require any special logic to be
performed, the Tradepoint Enterprise.PaymentServices.Web.DefaultOrderProcessor can be used
which will update the state of the order based on teh status of the
Tradepoint Enterprise.PaymentServices.PaymentResponse supplied. If your payment editor is
not going to be interacting with payment services, it is advisable to
create your own payment processor class that implments the interface.
Examples of existing
implementations:
DefaultOrderCreditCardEditor : the primary creditcard editor
for orders; a good example of using a payment service to process a credit card
payment and redirecting to either a 3D-auth redirect page, a success page, or
failure page.
DefaultOrderBillLaterEditor : an editor that does not use a
payment service
Register The Custom Payment Editor With the
Payment Type
To specify a custom payment editor for a payment
type: open the payment type configuration and set the path of the custom payment
editor control in the "Custom WebPayment Control" field. The path to the control
should start with a tilde (~), and be the full path from the website root to the
control (ie ~/memberservices/checkout/controls/{mycontrol}.ascx)
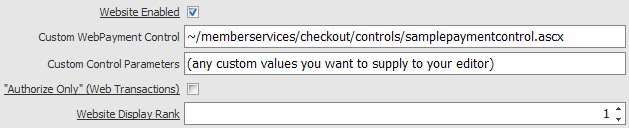
If you would like any custom arguments to be
supplied to your payment control, specify the values inthe "Custom Control
Parameters" field of the payment type. The format and values of the custom
arguments are defined by the custom payment editor's requirements.
* See the associated "SamplePaymentControl.zip" for
an example payment control to start from. The control should be extracted in the
/memberservices/checkout/controls/ folder. *