13.16 Knowledge Base
Dec/23/2007
To create a new article within the Knowledge Base follow the
following steps.
From the Home tab click on the knowledge icon. The next screen you
will see will be the main menu within your knowledge base.
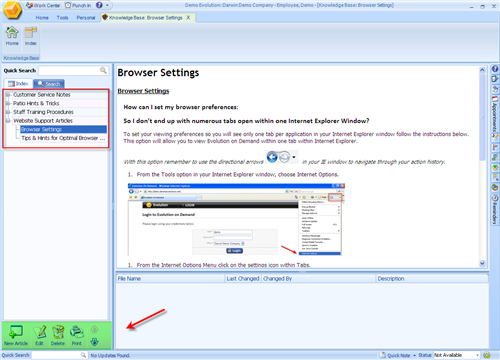
- On the left side
of the main screen you will see any existing Categories of
Articles.
- Highlight any
existing article to view it on the right side as shown in the image
above.
- Expandable menus
will hold any articles under any of the main Categories.
- Icons in the lower
left of the screen will allow you to create a New Article, Edit, Delete or
Print any existing articles.
Use the 'New Article' icon to create a new article. The main screen
you will see is shown below.
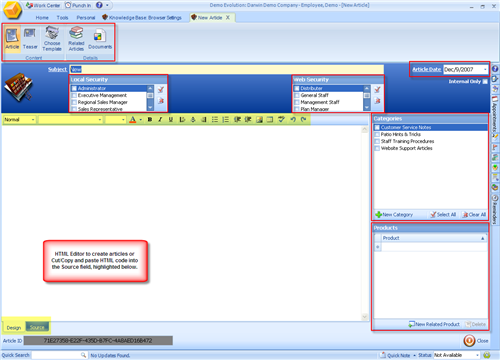
Highlighted tools include:
- Toolbar at the top
of the page for the New Article, Teaser page, tool to choose an Article
Template, add related articles to one you are building and add Documents to
any article you create.
- A Calendar for the
date your article is created. If a date is chosen for the future then the
article will automatically become available on that future date.
- Local Security
Settings - Determine which User Access profiles within your organizations have
access to this article. Check off which profiles for each article
created.
- Web Security Settings - Determine which user profiles through
your web portal have access to any articles. Articles can be public or for
specific partner or client profiles.
- Categories - Create additional Categories by using the green plus
button here. Assign an article to one or more articles by checking off one or
more Categories for each article.
- Products - Assign products to an article. For example, for a
basic instructional guide you can assign Products to it so viewers know which
Product is associated with this article. This can be used as an up-selling
tool for educational articles.
- Design and Source Tabs - Use the design tab to create your
article using the tools in the tool bar highlighted at the top of the open
field. Use the Source tab to Cut/Copy paste HTML from another source directly
into the KB to create your article.
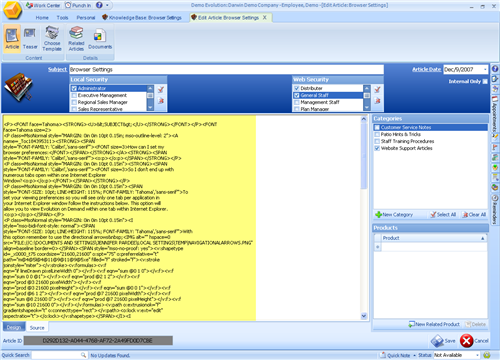
Content for your articles can be either generated directly within
the Design window of the main window in the knowledge base or HTML code can be
Cut/Copy and pasted from another source directly into the Source window to
pre-populate the design screen of your knowledge base article.

The example you see shows content that was developed through the
design screen of the new article window. Editing tools are highlighted in the
toolbar above.
Clicking the Source tab below shows the HTML code that is generated
when you develop your content directly in the knowledge
base.
The Source tab allows you to edit your HTML Source code in addition
to developing your content directly through the Design screen.
Whether you develop your content directly through the Design screen
or use the Source screen you have a full range of tools available to create
knowledge base articles with graphic and rich text capability for use internally
and externally within your
organization.