Document Security
Jan/3/2010
There are two
levels to security within Tradepoint for Document
Management.
1. Accessibility for Document used within Tradepoint
and/or shared through a web site.
2. Accessibility for different
profiles of users within a company using Tradepoint.
The combination of
these two levels of document security provide a fine level of detail for
document use and accessibility for all documents used within Tradepoint.
The
first level of document security will allow different profiles to access a
specific document. These are specified for each document created, scanned or
uploaded into Tradepoint.
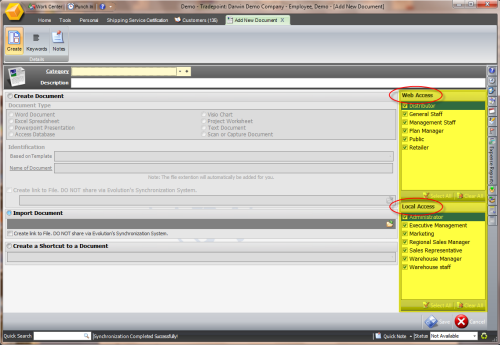
The Web Access highlighted shows which contact profiles will be
able to see this document through a web site. Steps for creating those Web
Access profiles are outlined below.
The Local Access profiles highlighted show the
security profiles of users within Tradepoint (these are applied to company
Employees and referred to as internal users). Security options for the internal
users are outlined below.
The steps to create Web Access profiles for
documents are outlined below:
1. Click on the Setup & Configure
tool (found by clicking on the cube icon in the upper left corner and choosing
the setup & Configure tool icon at the bottom of the menu.
2. Click
on the Contacts icon in the ribbon tool bar at the top of the page when the
Setup & Configure Tool opens.
3. Choose the Contact personnel option
at the top of the list of options on the left once Contacts are
chosen.
4. Expand the Contact personnel option by clicking on the + sign
next to Contact Personnel.
5. Click on Web Access Security once to
highlight the option and click on the ‘New Security Setting’ icon to create a
New Web Security Profile. The menu will look like the image below.
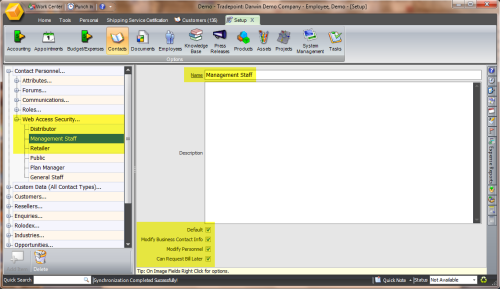
6. Options for the Web Access Security profile are
available with the check box options at highlighted at the
bottom.
7. When finished creating the new Web Access Security Profile
Click the “X” in the upper right corner of the Setup & Configure Tool. The
new profile will be saved automatically and will appear within the next new
document created within Tradepoint.
Accessibility options for existing security profiles within Tradepoint
are outlined below:
1. To access internal security profiles click on
Security from the Tools tab. (Security profiles must be created first and the
user must have access to the security profiles)
2. Since internal
security access can be controlled based on each specific location a user within
Tradepoint has access to we are going to use documents available within
Customers for the Regional Sales Manager profile for this
example.
3. Choose the profile to modify security access to (in this
case Regional Sales Manager is the existing profile we are
using)
4. Click on Customers within the security profile (in this case
the Regional Sales manager profile).
5. Scroll down the screen until the
option for document security is visible. The screen you will see will look like
the one below with the documents options highlighted.
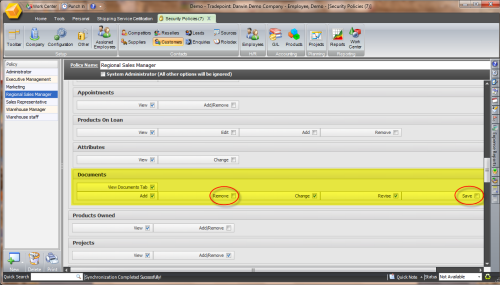
The options highlighted above are available throughout
Tradepoint to enable security access for users within Tradepoint. Options for
document access include:
1. The ability to view the Documents icon
within a given location (in this example customers).
2. The ability to
Add a Document.
3. The ability to Remove/Delete a
document.
4. The ability to change/edit a document.
5. The
ability to make revisions on an existing document.
6. The ability to
Save a document.
Options that have been checked off are enabled while options that are NOT
checked off will not be enabled for the security profile. For example, if users
are not going to have the ability to delete documents then do not check off the
option to Remove documents.
Once these have been specified for a specific
area within a security profile the user assigned to a security profile will have
access to use documents within the given Parameters.